Friday, July 27, 2012

The 'BEST' Cold Coffee Drink ,'EVER'!

That's Right! This is the Best Cold Coffee Drink, Ever!!!

I actually picked up this recipe at a Christmas party 4 years ago, from a friend!
("Thanks, Lisa! I know I always tell you what a big hit this drink has 
become in both of my family circles. But it also has become quite
the request with my circle of friends too!!")
So what better thing to do,......? Share it with the world!


This is where it begins!!!!

This is a single recipe, but I ALWAYS make a double batch, if not a quadruple one!

1 cup boiling water
1/4 cup instant coffee
1/2 cup sugar
1/4 gallon chocolate ice cream
1/4 gallon vanilla ice cream
1/2 gallon milk
bag of ice

   First make your coffee mixture. (I always make mine the night before and put it in the refrigerator, that way it can get cold) Mix the instant coffee, sugar and boiling water. Make sure the coffee and sugar melt. Then store it in a container that will be easy to pour from and travel, if your going to mix it at a party away from home. (My container in this picture could actually hold a quadruple recipe.)
Pour your ice in first, then add your vanilla and chocolate ice creams. Scoop it in small scoops. Then add your milk and then the coffee mixture. And 'Ta-Da'! That's it!!! Enjoy!!

This is before it has been mixed!
You will have some people like it best, right after it is made, so that they get big chunks of 
 ice cream. Then you have those that like it better after the ice cream has melted a little.
Either way, it is is just delicious!
(and did I mention that it is calorie free???,....
Just kiddin')
Scoop it, Slurp it and Enjoy!!!

(side note, if you want to make it into a grown up drink, you can add
Kahlua and or Baileys Irish Cream!)

:0)
Tuesday, July 24, 2012

Klutz!!!!!

Oh, don't worry, I'm not calling anybody 
a Klutz!
I'm talkin' about Klutz Books!!! (heehee)

You can find this book at KLUTZ.com or phone them at 1800-737-4123
Twirled Paper, by Jacqueline Lee, is the name of this book.
It's all quilling!
It is a really fun book with lots of fun designs that make
kids want to give it a try!
While my 4 and 5 year old kids, have been on summer
vacation, and my 2 1/2 year old was napping, I thought I would let them try quilling.
(They always like watching me when I'm working on my projects.)
Anyway, it took A LOT of patience, on my part, at first.
Then when they got the hang of it, they did real well.
I think you'll be quite impressed when you see the
outcome of their work.
The tool they used was the little slotted metal one from Lake City Crafts.
It's a perfect size for their little hands.
Both of them in deep concentration!

My 4 year old, was a little more inspired than his brother and worked on two projects.


Lil' chameleon lizard. Camouflaging !


My 5 year old excited about his chameleon too!

Just hanging out on a branch!!!


I cut the papers for them in the correct lengths, following
directions in the book. And I did help them
glue the pieces onto the papers. They pretty much did all the
pinching and shaping of each roll. I think since they have such little fingers,
they were able to glue and pinch and twist, much easier than that of an adult.
They used toothpicks to apply the glue!
I thought they did an awesome job!!!
And all in all it was very fun for me too!

Like the book says, "It's a Twirled, Twirled, Twirled,
Twirled World!"
(say that 5 times fast,........whew!)

:0)

Saturday, July 21, 2012

Yonana!!!!

Save Those Brown Spotted Bananas!!!!
(and not for banana bread)


Yes this is an infomercial :0)
The reason for my blog is to share things that I love and
believe in! So, I just love this new machine!
Plus my freezer isn't full of over ripe bananas, waiting to be made
into banana bread, anymore!
My sister-in-law, first bought one, and made us some sorbet' when we
were over they're house. And "Oh my goodness!" I was sold!
You have to use frozen fruit, and always a banana.
The banana gives it the sweetness and makes it so creamy, as if there were
dairy in it. But, (and this is the BEST part), the only
ingredients in it, are the fruits.
It is the purest form of a HEALTHY dessert!!!
There is no fruit juice added either!
Just a banana and whatever other fruit you choose!
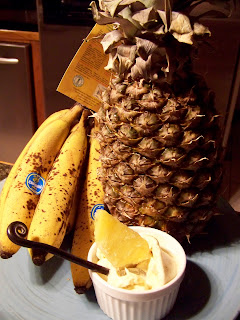
Tonight, we had banana and pineapple, But anything goes!
And if you want to make it a little sinful, you can add
chocolate too. But really there is no need!
Did I forget to mention, that kids LOVE it and will ask for more!!

I purchased mine at Bed Bath and Beyond, with 20% coupon I believe
it was around $39.00. So worth the investment!
So "Go Nanas, with Yonana!"
And ENJOY!

:0)

Friday, July 20, 2012

Feeling Whimsically Paisley

Lovin' Paisleys Lately

"Paisley-a distinctive intricate pattern of curved, feather-shaped figures based on a pine-cone from India." Origin: early 19th century: named after the town Paisley, Scotland, the original place of manufacture.
For some reason lately, I have been in a Paisley mood. I guess it's like feeling 'whimsical'.
(if there is such a mood)
Anyway, I was looking up 'Paisley' on Pinterest, and after looking at all the beautiful pictures of them. it totally explained how I feel,
(which I gathered is actually a little of everything all bundled together......????)

They are fun and playful, and yet
mysterious and deep.
I'm guessing because of the colors used.
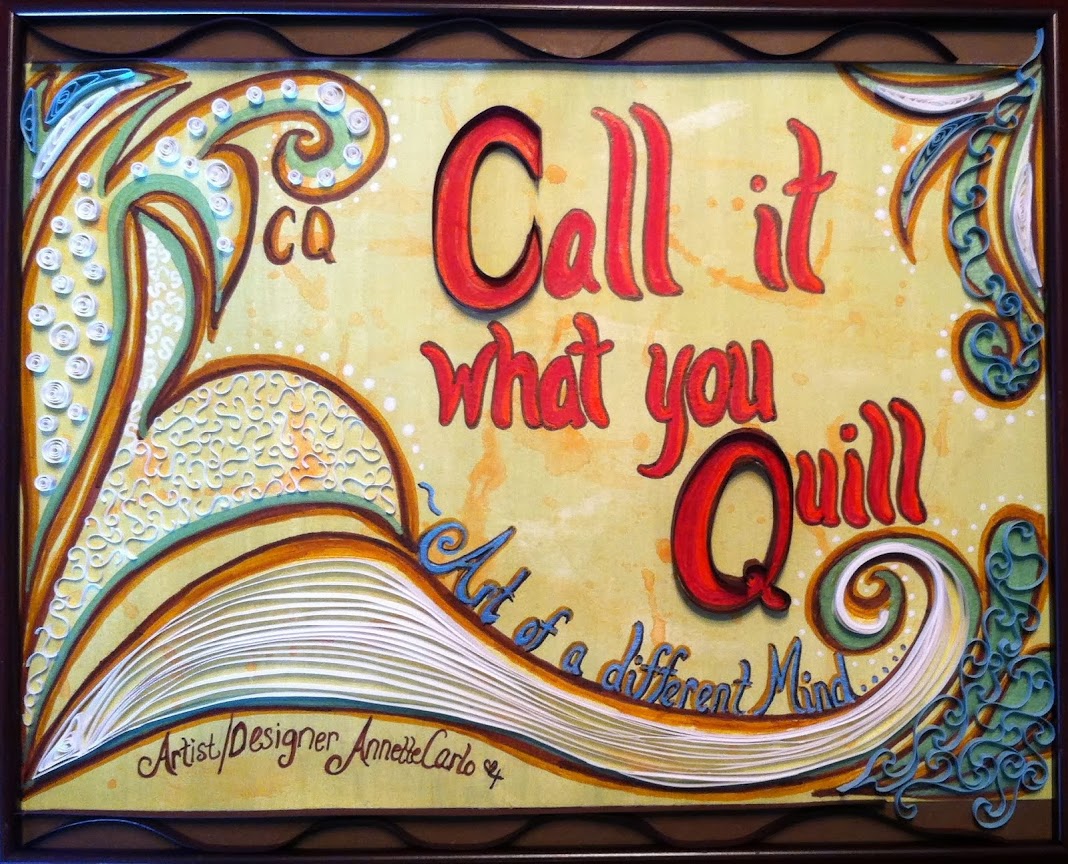
So I figured it would be fun to quill one.
With fall coming soon, I was inspired to use those colors!

 
My whimsical Paisley! Playfully, creating, and using different quilling techniques, paper punches, and beads.


For the little flowers, I punched them with a Family Treasures punch tool.
I used gold paper and then embossed each little flower and then 
glued ballentine in the centers.
I was also inspired, to do a Paisley, because of 
Christine Donehue's.
Hers was featured on all things paper, with Ann Martin.
It is just beautiful!!
I do hope you have times where you're feeling a
little 'whimsically Paisley too'!

 I would love to see one you created!
Just send a link to my blog in the comments section
and spread the Paisley feeling!!!

:0)

Monday, July 16, 2012

Jello 'Knox Blox'


 "Here's to a Month of Patriotism and Birthday Celebrations"

These are my famous sugar cookies, (sorry you're gonna have to wait for my secret recipe in another post :0).....)


 My oldest son's birthday is on the 4th of July, so it's always fun
to put that patriotic spin to it. (even if it does include dinosaurs)
(until he says otherwise :0)..)
 We had two family celebrations on the 4th, and so today,
was his third one!
I did make another cake, but I also made 'knox blox' jello treats.
These are fun, refreshing, and tasty treats, for Everyone!!!

Growing up we called these 'Knox Blox", but now I think they're called 'Jigglers'. (like always, I modified the recipe)

 Knox Blox

2 cups boiling water
2 cups ice cold water
1  6oz box of favorite jello (I used blue berry and red raspberry)
3 packages of Knox (original unflavored Gelatine)

Boil two cups water and add the 3 packets of gelatine and whisk quickly as you pour it into the water so that it does not clump. Then add your box of flavored jello, and whisk. Next, add your 2 cups ice water. Once cooled, then pour into a 9x13 pan. Carefully put in the refrigerator. (make sure your pan is level.)  Wait about 4 hours or until firm. Then either cut into squares, or use your cookie cutters to create your shapes.

With these left over pieces, I just break them up and then when the kids go to eat them, they try and make out shapes with them. Kinda like finding shapes in clouds.
Before you flip your pan over onto a cutting surface. Go around the edges with a thin utensil to loosen from edges. (you can pull on it a little too, so that it kind of lifts a little from pan). As you turn your pan over, place your hand underneath, just in case you need to help it out. Just be careful and let it come out slowly, as to not let it tear.  Then 'ta-da'. ................and............
Like the commercial use to always say,
"Watch it wiggle, see it Jiggle"
And have fun!!!
 Yum
It's always pretty to put them on a white plate, so your true colors of jello stand out. For Fall I use my leaf cookie cutters with all fall colors, Spring pastel colors with flowers , and so on and so forth.
 :0)


Friday, July 13, 2012

Special Thanks


This post is dedicated to all you wonderful
ladies out there who have inspired me 
to reunite, with my passion of 
'QUIILLING',
once again!!


Some of you may already know that you have inspired me and helped
me on my journey! But some of you may not yet know that, you,
were also participants in that inspiration.
I may add people to this list, here and there! Because
I hope this is just the 'start' of my journey!

*  <3  *

My Mother
Ann Martin,     All Things Paper
    Pritesh Ananth Krishnan,   Quilling Me Softlee
Yulia Brodskaya,   Yulia Brodskaya
Cecelia Louie,  Crafting Creatures  (purchased on Etsy)
Amanda Doster,   Paper Portals
Sandy Diaz,   Sweet Spot Card Shop
The North American Quilling Guild,   NAQG 
Helen Pierce,   Pinterest , NAQG
Barbara Wheat,    Pinterest 
Sandra Bruni-Shaver 
Antonella DeFalco, Quilling, Art and Expression
Szalonaisa Stepkowska, Szalonaisa Wonderland 


:0)


Wednesday, July 11, 2012

Quill on Canvas


*  <3  *


For My Mother

I designed this project with the inspiration of my mother's collection of Polish Pottery.
These are all on canvas. I plan on adding to it over time. One canvas at a time.


These first three canvases are Polish Pottery designs. Polish Pottery has so many different designs, it was fun to do something that had such a variety and yet they all tie in somehow.                     
This one I used my cross design called 'Francesca' . My mother's faith means a lot to her so I
wanted to bring that into this collage. And of coarse I used my favorite space filler, that I call
'Serendipity'. It's just using a bunch of 'S' style quills to fill space.
I did these letters by freehand. The flowers I made are designs by  Cecelia Louie, with www.craftingcreatures.blogspot.com (she sells her
design tutorial on Etsy. I thought it was well worth the money)
She does beautiful work!

 I decided to do this word, because Family, is what my mother is all about!  She is the
best mom and does everything for her family. That is why I love her sooooooo much!
(I only hope that I can be that same kind of mother to my kids)
Thanks Mom!

:0)

Monday, July 9, 2012

Independence Day

Better Late Than Ever

This project I just kinda thought of and threw together!
We needed some more decorations for our Holiday Tree for
the 4th of July, so this is what we came up with.


As you can see, my daughter's is a lil' more 'BLINGY' than her brothers! (girls will be girls)

I used my Sizzix, Heart, Die Cut!
I first cut a firm, but thin, cardboard heart. Then I folded some
aluminum foil (twice). Then cut into that. (the die cut actually crimped the
edges of the foil so that it sealed the four sheets (from the fold) together. So it made a
stronger, sturdier heart.
We then glued a foil heart on each side of the cardboard one, and then 'Glitzed'
it up!


"Ta Da" this is it! I'm thinkin' that next year we can make some more. (for some reason this
holiday, doesn't have a whole lot of decorations on the tree) But I think it still came out
looking 'Patriotic'!

*  <3  *

A HAPPY FOURTH OF JULY TO YA' ALL!!!
"LET FREEDOM REIGN"
 :0)

Friday, July 6, 2012

Creative Lettering

*   <3  *

These two pieces that I made were for friends of mine
who are teachers. At the end of this last school year, they were
told they might not have jobs this upcoming school year.
They are wonderful women and I just wanted to let them know to 
'keep the faith' and 'continue to do what they love to do'!


The lettering in these pieces I free handed from a book for scrapbooking. "The Art of Creative Lettering" by Becky Higgins


Here's to all of you teachers that might be losing your jobs, due to budget cuts!
My 'blessings'  go out to you and your families!
"Hang in there and keep the faith, we love you!!!!
:0)

Thursday, July 5, 2012

Stained Glass with Melted Crayons


Stained Glass Look Turtle and Butterfly

(using waxed paper and crayon shavings)
We let them melt, out in the sun, on a cookie sheet. We then traced the shape and cut them
out. We should have made an outlined frame from construction paper, because once the
crayons harden, the waxed paper wanted to come apart. Then the shavings started
crumbling and falling out. I then applied glue just at the edges (when I was a little girl we used to make these but kept them in square shapes, so it was easy to make a black border around them)


Rock Painting

Summer Break

I've been trying to do whatever I can to keep my lil' ones busy this summer.
(I do have to thank Pinterest for giving me some of these ideas)
Thank You!

'Good, Ole' Rock Painting'