Monday, December 31, 2012

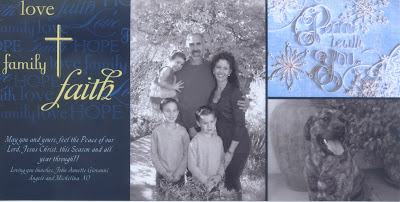
PEACE BE WITH YOU

 Goodbye 2012
and
Welcome 2013


THIS,........IS.......MY WISH,........... FOR ALL,
IN THE
*NEW YEAR*
AND
ALWAYS!!!!


And,
I would like to share with you how I did this project.

I have a sketch pad that I usually will draw and start each new project with.
It's my idea book and my inspiration.
After I draw my first sketch, then I draw out my project in the size I want.
I was lucky that I was able to see my lettering through this blue paper.
I used a light box to make it more visible, and then I lightly traced it onto 
the snowflake paper.
As you can see I use the wider paper. It is 1/4 inch.
I used my rough draft to help size and shape my paper before I glued them down.
One letter at a time and it starts coming together!

This is the way I do most of my projects. I create as I go!
I then added snowflakes to give that 2D affect.
 Photographing quilling can be fun and yet tricky.
So with this project I tried all kinds of different angles and other things.


This project was not made for anybody in mind so I really haven't done
anything with it. But I did add it to my Christmas card!
And I did think about sending it to Snowflakes for Newton, but
I actually have a new inspiration for all those
beautiful little children going back to school, to help make
their first day back, a true winter wonderland.


These next photos are just pics I took and then changed with
 my computer. It was kind of fun to see how one
picture could look so different.


I do have to say, this post was done last minute and very, very late at night
and it probably will not be one of my favorites, but I wanted to get this out
before the new year begins!

God Bless you and your families
and I will post again 
next year!!!

:0)


Love to you all!
Annette Carlo

Sunday, December 23, 2012

WISHING YOU A VERY MERRY CHRISTMAS


MERRY CHRISTMAS 
TO YOU 
AND YOURS!!


Love and God's Blessings,

Annette Carlo

:0) 


t


  Ps. I will be having a follow up to this blog with a little bit of a step by step, to show you how 
this was done. I actually started this back in October but have been working on other projects in between. I made it for this years Christmas card !
See you in the New Year! xo

Saturday, December 22, 2012

SNOWFLAKES FOR NEWTOWN and SNOWFLAKE PATTERN #2012

 Hello All!!!!
I found this on 
It's such a wonderful idea, I just had to share it with you too!
Thank you Antonella :0)!
Snowflakes for Newtown
When school resumes for Sandy Hook, it will be in a new building.  There are many parent-volunteers who are working to ensure that the students are welcomed back by a winter wonderland.  They are doing this by decorating the new school with as many unique snowflakes as possible.  This is how you can help, and get everyone in the family involved young and old alike.
From the organizers: 
"We encourage senders to be as creative as possible, remembering that no two snowflakes are alike. Please make and send snowflakes by January 12, 2013 to the Connecticut PTSA"
Here is the Address for those wishing to contribute:
Connecticut PTSA
60 Connolly Parkway
Building 12, Suite 103
Hamden, CT 06514


I think this is such a beautiful idea and gift for all those hurting hearts!!
May Peace find it's way into their hearts!

Peace be yours,
Annette :0)

SNOWFLAKE PATTERN #2012


I really wasn't planning on posting this blog just yet, but I thought it went well with the 'Snowflakes for Newtown', which I just happened to stumble upon this evening!
 Every year, I design a new snowflake pattern, and make them, and give them to a few "select"
family and friends. As it is that equals to about 15 snowflakes!
I try to remind myself to start them in September, because they do
take some time to do. Especially 15 of them!
But unfortunately, this year I was busy then too, and now I have only
6 of them completed!!
Yikes!!
(I'll just have to do some days of going to bed at 3 am)
:0)

I hope this is legible for everyone to see!

This board is to help keep all your shapes the same size. I just love it!!
Anyway, follow directions that are in the above pattern.

To get the eccentric style, drag all of your layers to one side. And place a pin. Then add a little bit of glue, like in the picture below. Wait for it to dry and then pinch your shapes.

Once you have shaped all of your loose circles. Then put them in place for gluing.


Side note: to create the small open circles and open marquise
I wrapped a 4" strip around my quilling tool. Wrap it once and place some glue, then finish wrapping and apply a dab of glue at the end of the strip. Slide it off of the tool and then you have your circle. To get the marquise, just pinch both sides.


I use graph paper. I know there is a download for a snowflake graph, but I couldn't find it.
Anyway, glue and hold with pins.
Snowflakes are tricky, in the sense that all sides have to be equal.
So pins are very helpful in trying to achieve
perfection.


The small open circles and marquise are glued second to the last. The very last thing to glue, is the silver loose circle, right in the center.


And here is the finished product!

You can use different colors to get a different look,
or add glitter, or gems, or what ever fluffs your snowflakes!!

I hope you like this and use it!
Just remember though, for the "Snowflakes for Newtown", 
it would be nice that they all be different.
Remember, no two snowflakes are ever alike!


  Enjoy and share this with anybody and everybody you know!
And don't forget to send your snowflakes to Newtown!!
26 Acts of Kindness!

May Peace be yours
Love
Annette 


  :0)


Please, if you do make a snowflake using this pattern, can you post it to my blog and share it with others...? It would be neat to see all the different ones! ;0)