Monday, December 31, 2012

PEACE BE WITH YOU

 Goodbye 2012
and
Welcome 2013


THIS,........IS.......MY WISH,........... FOR ALL,
IN THE
*NEW YEAR*
AND
ALWAYS!!!!


And,
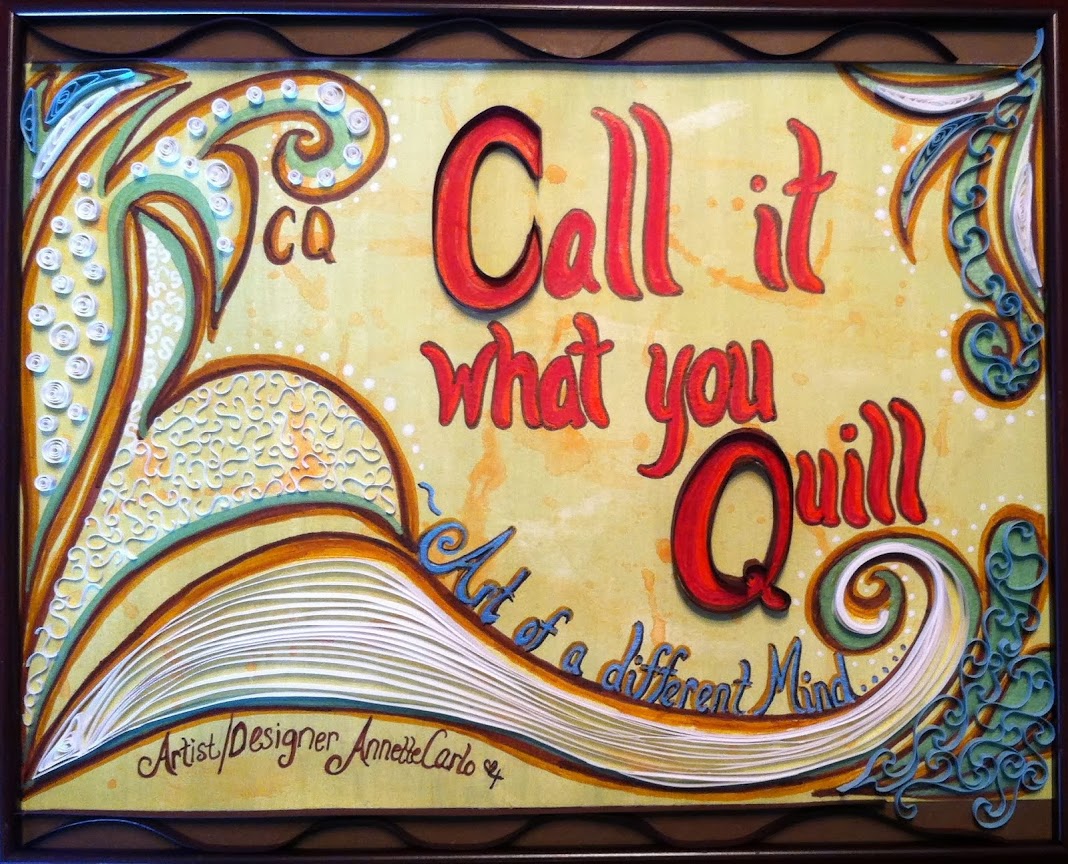
I would like to share with you how I did this project.

I have a sketch pad that I usually will draw and start each new project with.
It's my idea book and my inspiration.
After I draw my first sketch, then I draw out my project in the size I want.
I was lucky that I was able to see my lettering through this blue paper.
I used a light box to make it more visible, and then I lightly traced it onto 
the snowflake paper.
As you can see I use the wider paper. It is 1/4 inch.
I used my rough draft to help size and shape my paper before I glued them down.
One letter at a time and it starts coming together!

This is the way I do most of my projects. I create as I go!
I then added snowflakes to give that 2D affect.
 Photographing quilling can be fun and yet tricky.
So with this project I tried all kinds of different angles and other things.


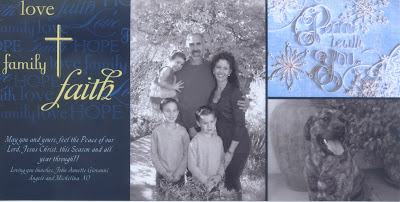
This project was not made for anybody in mind so I really haven't done
anything with it. But I did add it to my Christmas card!
And I did think about sending it to Snowflakes for Newton, but
I actually have a new inspiration for all those
beautiful little children going back to school, to help make
their first day back, a true winter wonderland.


These next photos are just pics I took and then changed with
 my computer. It was kind of fun to see how one
picture could look so different.


I do have to say, this post was done last minute and very, very late at night
and it probably will not be one of my favorites, but I wanted to get this out
before the new year begins!

God Bless you and your families
and I will post again 
next year!!!

:0)


Love to you all!
Annette Carlo

Sunday, December 23, 2012

WISHING YOU A VERY MERRY CHRISTMAS


MERRY CHRISTMAS 
TO YOU 
AND YOURS!!


Love and God's Blessings,

Annette Carlo

:0) 


t


  Ps. I will be having a follow up to this blog with a little bit of a step by step, to show you how 
this was done. I actually started this back in October but have been working on other projects in between. I made it for this years Christmas card !
See you in the New Year! xo

Saturday, December 22, 2012

SNOWFLAKES FOR NEWTOWN and SNOWFLAKE PATTERN #2012

 Hello All!!!!
I found this on 
It's such a wonderful idea, I just had to share it with you too!
Thank you Antonella :0)!
Snowflakes for Newtown
When school resumes for Sandy Hook, it will be in a new building.  There are many parent-volunteers who are working to ensure that the students are welcomed back by a winter wonderland.  They are doing this by decorating the new school with as many unique snowflakes as possible.  This is how you can help, and get everyone in the family involved young and old alike.
From the organizers: 
"We encourage senders to be as creative as possible, remembering that no two snowflakes are alike. Please make and send snowflakes by January 12, 2013 to the Connecticut PTSA"
Here is the Address for those wishing to contribute:
Connecticut PTSA
60 Connolly Parkway
Building 12, Suite 103
Hamden, CT 06514


I think this is such a beautiful idea and gift for all those hurting hearts!!
May Peace find it's way into their hearts!

Peace be yours,
Annette :0)

SNOWFLAKE PATTERN #2012


I really wasn't planning on posting this blog just yet, but I thought it went well with the 'Snowflakes for Newtown', which I just happened to stumble upon this evening!
 Every year, I design a new snowflake pattern, and make them, and give them to a few "select"
family and friends. As it is that equals to about 15 snowflakes!
I try to remind myself to start them in September, because they do
take some time to do. Especially 15 of them!
But unfortunately, this year I was busy then too, and now I have only
6 of them completed!!
Yikes!!
(I'll just have to do some days of going to bed at 3 am)
:0)

I hope this is legible for everyone to see!

This board is to help keep all your shapes the same size. I just love it!!
Anyway, follow directions that are in the above pattern.

To get the eccentric style, drag all of your layers to one side. And place a pin. Then add a little bit of glue, like in the picture below. Wait for it to dry and then pinch your shapes.

Once you have shaped all of your loose circles. Then put them in place for gluing.


Side note: to create the small open circles and open marquise
I wrapped a 4" strip around my quilling tool. Wrap it once and place some glue, then finish wrapping and apply a dab of glue at the end of the strip. Slide it off of the tool and then you have your circle. To get the marquise, just pinch both sides.


I use graph paper. I know there is a download for a snowflake graph, but I couldn't find it.
Anyway, glue and hold with pins.
Snowflakes are tricky, in the sense that all sides have to be equal.
So pins are very helpful in trying to achieve
perfection.


The small open circles and marquise are glued second to the last. The very last thing to glue, is the silver loose circle, right in the center.


And here is the finished product!

You can use different colors to get a different look,
or add glitter, or gems, or what ever fluffs your snowflakes!!

I hope you like this and use it!
Just remember though, for the "Snowflakes for Newtown", 
it would be nice that they all be different.
Remember, no two snowflakes are ever alike!


  Enjoy and share this with anybody and everybody you know!
And don't forget to send your snowflakes to Newtown!!
26 Acts of Kindness!

May Peace be yours
Love
Annette 


  :0)


Please, if you do make a snowflake using this pattern, can you post it to my blog and share it with others...? It would be neat to see all the different ones! ;0)

Thursday, December 20, 2012

NANA'S GARDEN OF LOVE


A Gift for my Secret Pal in Bunco


I am in a Bunco group that gets together once a month! We draw names in 
December to choose our Secret Pal for the upcoming year. 
This, I made for my secret pal that I had for the year 2012.
She is a wonderful woman and so I wanted to do something special for 
her for Christmas! 
She recently become a Nana (Grandma) for the 5th time!
She, also, has a love for red roses!
Therefore my inspiration!!!


I do have to say, I had an idea of what this project was going
to include, I just didn't know what or how I was going to 
present it!
I was having a block!!!!! (Ewwww, I can't stand when that 
happens!!)
I wanted it to be dainty but I also wanted to use a 
little modern quilling and not too old fashioned,
styled.
Here are the stages that I progressed in.
 I fumbled around with the placement of roses and different
swirls. (It's probably a bad habit, but I like to create as I go along,
not really having it drawn out exactly before I start, ooops!)
*Anyway, another helpful thing is my camera on my phone. I may
stand up and look down on my project and see it a certain way, but
when I take a picture on my phone and then view it that way, it gives me a whole different perspective! (just a helpful hint when
your working on your projects.)
Read after *  (above) to learn a helpful hint that I find very useful as I work on my projects!

 All of the roses are made with paper!
I do apologize, but to keep this blog short, I am not including the how to's on this project. But I do promise, after the holidays, I will have a second part to this blog, and include some
'share and tell' with you! :0)     (I promise)


If you notice, I used a Sharpie marker to run along the top edge of the hearts and the word Nana. I wanted it to help give a little more dimension and color.


And, WahLa!! Here is the final outcome!


As always, depending on who I make a gift for, they always bring me 
out of my comfort zone and stretch my imagination. (And they
don't even know that they are doing that!)
But I do thank them for getting me to think outside of my own little box!!!


Again, stay tuned for a Free snowflake pattern, and some
'share and tells' about this project!
(I have been a little short of free time, as I am sure all of you are. 
With all of the Christmas things to do.)

I do hope that somewhere in your time of busyness, that
you may find that place of silence, and reflect on
the true meaning of this Holiday!
"A King is to be born"
"Give Praise and Thanks"
"Alleluia!! "


:0)


Ps. I do welcome any comments you might have on any of my projects or blogs. You help keep me 
inspired too, so for that, I THANK YOU!!! :0)  Annette xo

Thursday, December 13, 2012

'BEJEWELED' Christmas Tree


Thanks to my mother, again, for being my inspiration!!!
My mother always sees, or finds things like this
that spark her interest. And then, of course, it does the same to me.
I guess you can say we have a lot in common.
What would I do without her???!!!!!!
(Mom, I love you, and thank you for always inspiring me!!!)


Back in 1989, she found this article in this magazine 'Creative Ideas'.
Well, years later, she and I decided to finally use this idea
and make a jeweled Christmas tree of our own.

We actually, even put lights on ours too. They are battery operated.
The battery box is on the back and an extra frame was built to hold it in place.
(Thanks to my dad, he's a crafty one also. Carpenter by trade!)

I had many jewels of my own, but I did go by a few, also.
My tree is actually an heirloom. I have pieces on there that are from
both grandmothers, great aunts, aunts, mom and dad, friends
and many more. It is quite a treasure!
Many of the pieces are earrings that I used to wear,
back in the 80's. The bigger the better, was the motto then!
Anyway, many of them were real crystal and that's why they shine even brighter.
(This tree would probably cost a fortune, if it were made today!)

Buttons, earrings, pendants, brooches, necklaces, bracelets, etc., were
used to create this. Before gluing any of these jewels on. 
I clipped the backings off so that it would lie flat onto the board.
I had bought the frame, knowing I had enough jewels to
make a large tree. The backing is a suede board used for matting, sold at craft
stores. First, I laid out all of the jewels to create the shape.
 Mind you, this process probably takes the longest. 
Because placing them down in one spot, doesn't mean that it will stay there. 
They get moved around, and moved around. Up until the minute your ready to glue them! 
Then I glued one on at a time. It's really that simple!
 Between my mother and I, we have made a few!
And each one comes out completely different!
So, don't throw out all of that old jewelry that you don't or/won't ever
wear again. Look what you can do with it!
Priceless!
Enjoy, and 
Get Inspired!!!
:0)
Ps. Thank you to all my followers and people who read my blog and leave comments!
      You help keep me inspired!!!
      Peace be with you!!! :0) Annette xo

Sunday, December 2, 2012

Santa Claus, Embellished, Egg Ornament


HO HO HO, A MERRY OLE SOUL

This Santa Claus egg ornament I actually made in 2004. But I thought I would
share it with you, since I am bringing all of my Christmas decorations out, for the season!
My mother and I used to take an egg decorating class
from a wonderful woman, Joyce Melanson!
She, since, has moved and I miss her and the chance to
brake away from home duties and go work on beautiful eggs.
A lot of the work we did, was in the style of Faberge'! But we also did
egg carving, beaded eggs, egg necklaces, and pieces like this, called
ball relief. It's a form of layering cut pieces of paper and rolling them
a little bit with an embossing tool, and then gluing them to create a 3D affect.

This is how the original picture was before I embellished it. 
Joyce had this liquid called 'Decal It'! It was like a glue. But it allowed you to make, like, 
a transfer, with any paper picture you find. And when applied onto the egg, it was smooth.
Almost as if it were a rub on applique.
As you can see in this picture, I did star, cuts on the sides of the egg, with an electric drill.


 Usually after applying the applique with Modge Podge, then a light coat of it is applied after, just to seal it. Then the layering of different cuts of the same picture, are applied to give that 3D affect.
I also used crystals and beads. And of course for Santa's beard, I used doll hair.
I added a little bit of that crystal lacquer to his eyes, in hopes to give them a real twinkle!

A HO HO HO!
I hope you enjoy this and it may inspire you!
Remember, egg decorating doesn't have to be just for Easter!!


I will probably be adding posts, on things I have made in the past. Only because I am busy quilling my snowflakes, that I do every year, as gifts, for family and friends.
But,.....
Keep tuned in, because I will be giving out a FREE
snowflake pattern in upcoming posts!!


December is upon us!!
Happy Advent!

:0)


Joyce, this is a special message just for you!!
Mom and I miss you and wish you
would move back!
If you're teaching egg class out there, I hope
those women know, just how lucky and blessed they are to have you be their teacher!!Thank you for everything you taught us!!!  
Love you and God Bless You!


Tuesday, November 27, 2012

Mock Lofthouse Cookie Recipe


Last bit of Fall's Delights

This post is to share with you one of my (and many family and friends) favorite desserts.
I found this recipe when I Googled 'Lofthouse Cookie Recipe.'
I think there are a couple different ones but this is the one I found and
tried and stuck with. Because they are sooooo yummy!
I had also found an awesome frosting recipe too but I lost it and can't seem to
find it again. So, if you continue reading, you will see what kind of frosting I use as an alternate.
In my opinion it's perfect, and it's a time saver. (Especially when you
have to make 180 cookies.)
So here is the recipe and feel free to copy it. I have added changes and
little side notes that have helped me perfect it.
Enjoy!

  • 1 Cup of butter 
  • 2 Cups of sugar
  • 3 eggs
  • 1 tsp. of vanilla
  • 1 tsp. of baking soda
  • 1 tsp. of baking powder
  • 1 1/2 Cups of sour cream (it's best with sour cream that is NOT non/or low fat)
  • 5-6 Cups of sifted flour (Start with 5 1/4 cups, until it's not super sticky, a little tacky is ok, because you will be adding flour when rolling your dough out) Too much flour makes for a harder cookie and the dough is not nice when rolling and cutting.
Cream together butter and sugar. Beat in the eggs, vanilla and sour cream.
Then mix in the dry ingredients. I started with 5 1/4 cups of flour and used the rest when I actually rolled them out. Cover and refrigerate overnight or at least 8 hours. This makes the dough easy to roll out and cut. Preheat the oven to 425 degrees. Sprinkle your cutting board (or other rolling surface) liberally with flour. With a well-floured rolling pin, roll out the cookie dough to about 3/8 inch thickness and use floured cookie cutters to cut your shapes. (I separate the dough in about four big clumps, when rolling them out). I put them on cookie sheets and bake them for exactly 8 minutes. ( When I have to make a lot of cookies, I will roll my dough thinner and then heat oven to 400 and bake for 10 minutes. Depending on your oven. If I make them too thick and keep it at 425 sometimes they have browned on outside edges and have not been fully cooked in center. Again, depends on your oven.)

After dough has been refrigerated, your ready to roll and cut! You will fall in love with the feel of this dough! It's such a wonderful texture!
This is just showing the the thickness of the cookie before it's been baked!

I had a hard time finding a turkey cookie cutter, but Michaels came through for me!!!!
Some cutters are bigger than others, but this was a medium size one and I was able to 
bake 20 at a time. And it yielded about 180 cookies!(doubling the recipe)


I actually completed cutting and baking cookies in less than 2 hours. Including clean up!
Here they are! A bunch of lil' turkeys, not realizing they're day is up!!! Heehee
By the way, my family likes them even without icing. They are not overly sweet, but just enough to where you can just 'gobble' them up. (no pun intended) 
:0D


This next step, I added myself. By accident but now I do it know matter what, because it makes the cookies even softer and more moist. After the cookies have cooled, I place them in Ziplock bags. Don't put too many in because they can get too moist and start sticking together. (By the way, you can also freeze 
      these cookies at this point and they will taste as fresh as the day you baked them.)
I put abut 25 of these lil' guys in one 1 gallon Ziplock baggie.


This is the icing that I like to use. Caution: It does NOT harden! It stays soft, so you CANNOT
stack them.
To save money I used pint size Ziplock bags to use for my frosting colors. 
To fill each bag I place the bag over a tall drinking cup, fill it, and then remove it, zip it and wha-lah!
I'm ready to frost!
As you can see, I used four colors. And used the Wilton brand colors.
 Another wonderful thing about this icing, it lasts forever if you keep it in the refrigerator.


The eyeballs I used are found in the cake decorating section at JoAnnes. I'm sure
Michaels carries them too. (I thought they were perfect because they kind of made 
the turkey look scared!!!!)

Anyway, I do hope you give this recipe a try, because it will definitely be a big
hit by all!!! And you can have so much fun with it too!
I hope all of you here in the US, enjoyed your Thanksgiving Holiday!

Now,..... time to get ready for Christmas!

God Bless you 
and 
Thank You!

 :0)